This is a useful tool as it can make your life easy as a DBA.
This post shows how to install and configure the tool.
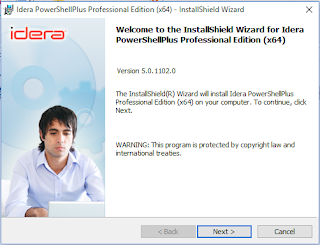
Download IderaPowerShellPlusSetup-x64.zip (25 MB) from Idera's website after registering and get the free tool. Get the tool to match your OS architecture (herein (x64) on a Laptop running Windows 10.
Extract files to a location of your choice and double click to begin installation.

This tool helps to:
Configuring the tool
After downloading and running the program you may need to do some configuration.

PSP_05
Please configure as needed by clicking Next.
The first is the execution policy related. Here unrestricted option chosen.
PSP_6
Click Next. Configuring Remoting Configurations is next. Not added here.
PSP-7
Click Next. Configuring SQL Server Connections is next
PSP-8
In the above, click Add Server to bring up SQL Server Configuration. Server Instance here is,
Hodentek8\RegencyPark with Windows Authentication. The ellipsis button does not (may not) guide you to get the information.
PSP_9
Find server/instantce from SSMS or otherwise and enter. Server gets added.
PSP_9a
Server gets added. PSP_10
Click Next. Next in line is Configuration of Email Settings
PSP_11
If you are an individual with an ISP, use the ISP provider information.
PSP_11b
Click Test to verify, it works. Check email at the receiving end.
Finally the script execution warning note:
PSP_12
Summarizing with a summary of actions taken.
PSP_13
Click Finish. Now you have the PowerShellPlus UI to work with:
PSP_14
You get an app added to your All Apps menu in Windows 10.
Rock and Roll!
This post shows how to install and configure the tool.
Download IderaPowerShellPlusSetup-x64.zip (25 MB) from Idera's website after registering and get the free tool. Get the tool to match your OS architecture (herein (x64) on a Laptop running Windows 10.
Extract files to a location of your choice and double click to begin installation.

This tool helps to:
- Create Usefull other Tools
- Automate Repetitive Tasks and save time
- Supports multi-server automation
- Monitoring, exporting/importing files
- Create PowerShell SMO Scripts
- Carry out compliance tasks
Configuring the tool
After downloading and running the program you may need to do some configuration.

PSP_05
Please configure as needed by clicking Next.
The first is the execution policy related. Here unrestricted option chosen.
PSP_6
Click Next. Configuring Remoting Configurations is next. Not added here.
PSP-7
Click Next. Configuring SQL Server Connections is next
PSP-8
In the above, click Add Server to bring up SQL Server Configuration. Server Instance here is,
Hodentek8\RegencyPark with Windows Authentication. The ellipsis button does not (may not) guide you to get the information.
PSP_9
Find server/instantce from SSMS or otherwise and enter. Server gets added.
PSP_9a
Server gets added. PSP_10
Click Next. Next in line is Configuration of Email Settings
PSP_11
If you are an individual with an ISP, use the ISP provider information.
PSP_11b
Click Test to verify, it works. Check email at the receiving end.
Finally the script execution warning note:
PSP_12
Summarizing with a summary of actions taken.
PSP_13
Click Finish. Now you have the PowerShellPlus UI to work with:
PSP_14
You get an app added to your All Apps menu in Windows 10.
Rock and Roll!


No comments:
Post a Comment