Saturday, December 23, 2017
Friday, December 22, 2017
Installing SQL Server Reporting Services 2017 - Part1
Download the following executable file from here:
https://www.microsoft.com/en-us/download/details.aspx?id=55252
SQLServerReportingServices.exe (92.7 MB)
Version: 14.0.600.490 (11/1/2017)
These are from download site:
Reporting Services offers the following:
Paginated reports optimized for document generation and printing.
Mobile reports optimized for mobile devices, with responsive layout that adapts to different devices and the different ways you hold them.
A modern web portal you can view in any modern web browser.
System requirements:
Supported Operating System
Windows 10 , Windows 8, Windows 8.1, Windows Server 2012, Windows Server 2012 R2, Windows Server 2016
You'll need
.NET Framework 4.5.2 or later
SQL Server Database Engine (2008 SP4 or later), to store the report server database
You must first install the Reporting Services and then run the Reporting Services Configuration Manager for 2017 which is installed when you install SQL Server 2017 Developer Edition (in the present case).
Installing SQL Server Reporting Services 2017-a new experience
Prior to SQL Server 2017, there was an option to include SQL Server Reporting Services during SQL Server Installation.
If you have reviewed my previous post related to Installing SQL Server 2017 Development edition you would have noticed the absence of anything related to SQL Server Reporting Services 2017. This is by design.
In SQL Server 2017, you need to install SSRS 2017 separately. The installer file itself is very small about 100 MB. There are three advantages by using the new installer:
https://www.microsoft.com/en-us/download/details.aspx?id=55252
If you have reviewed my previous post related to Installing SQL Server 2017 Development edition you would have noticed the absence of anything related to SQL Server Reporting Services 2017. This is by design.
In SQL Server 2017, you need to install SSRS 2017 separately. The installer file itself is very small about 100 MB. There are three advantages by using the new installer:
- If you have installed SQL Server 2017 Database engine, it just takes a short while to install SSRS 2017
- Update SSRS 2017 very quickly
- The installer is stand-alone without bringing other programs in, you can always install the latest version without impacting your SQL Server databases or other features.
https://www.microsoft.com/en-us/download/details.aspx?id=55252
Tuesday, December 19, 2017
Read report's RDL file details using XML Notepad
A RDL file is a report definition language (RDL) file. It has every bit of information in the file.
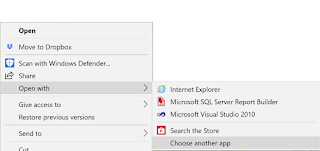
You have several options to look at a report's rdl file as shown (by right clicking the (any report) reportany.rdl file.
XmlRdl_0
You could open in Notepad and it is going to be a very large file and you may get yourself lost in it without recognizing the key areas. Even using Microsoft Edge it is the same. You could open in Microsoft Visual Studio, but not every one may have it.
The reccommendation is XML Notepad. This is a good application to review the properties of a report rdl file.
You may download XML Notepad as described here. it is free.
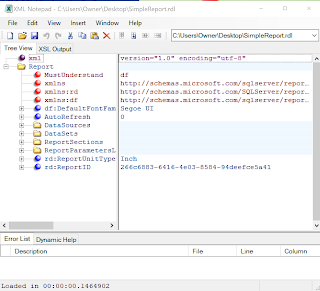
Launch XML Notepad and click FIle menu to open the rdl file. In this case I am using a simple file called SimpleReport.rdl.
The file gets opened as shown. Now you see why I recommend this application. You canveyr clearly see how ggthe report is constructed.
XmlRdl_1.png
Expand the DataSource to see the details.
XmlRdl_2.png
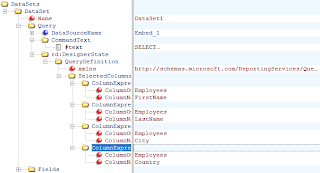
Now open the DataSets node as shown.
XmlRdl_3.png
Click the Fields to see the fields in the data as shown.
XmlRdl_4.rdl
Well, you can also see the report design.
XmlRdl_5.rdl
Explore more and enjoy!
I guess you agree with my assertion that XML Notepad is the best to see the report rdl file.
Sunday, December 17, 2017
Connect to SQL Server 2016 using Microsoft SQL Operations Studio
It is so easy to connect to SQL Server database.
Read here: What is Microsoft SQL Operations Studio?
Read here: Microsoft SQL Operations Studio User Interface
Watch this video: Connecting to SQL Server 2016 Developer edition database using
Microsoft SQL Operations Studio
Tuesday, December 12, 2017
Run a simple query in Microsoft Operations Studio
In order to run a query in Microsoft Operations Studio you must first to connect to a database on an instance of SQL Server.
It is so easy to connect to SQL Server database.
Step 1: Understand what is meant by Microsoft Operations Studio
Read here: What is Microsoft SQL Operations Studio?
Step 2: Get a handle on using this new Interface
Read here: Microsoft SQL Operations Studio User Interface
Step 3: Learn how you may connect to SQL Server (In this example SQL Server 2016 Developer)
Watch this video: Connecting to SQL Server 2016 Developer edition database using
Microsoft SQL Operations Studio
Step 4: Running a query on SQL Server after connecting to Northwind database
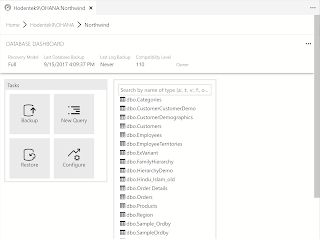
Now that you are connected, you can access all the tables, views, etc as shown.
When click on New Query icon in the Microsoft Operations Studio, the query plane is open as shown.
You will be required to enter a query starting at Line 1. When you type SEL, the Select statement begins.
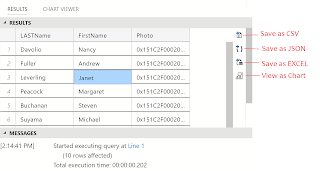
You do not get the columns of employees as it is not yet even mentioned. Type in the rest of the query. Click Run. The results pane opens below the Select statement as shown.
The Results pane has a few controls on the right. This is cool. Now you can export the results to CSV, JSON or EXCEL. You could also view it as a chart.
Perhaps, SSMS should have a view of viewing data as chart.
In summary, it is easy to connect to SQL Server and run queries. It should be noted that there is no syntax check for queries as well as intellisense.
Tuesday, December 5, 2017
SQL Operations Studio User Interface
In order to use a program, it is first of all necessary to have a clear understanding of the User Interface for screen driven application.
SQLOPS when invoked brings up the user interface screen. It is here you do most of your development.
As mentioned in previous posts this is a light-weight tool. It provides a much easier interface then the SQL Server Management Studio, a heavy-weight option.
You invoke the program by double clicking the sqlops.exe in the folder where you saved the application files.
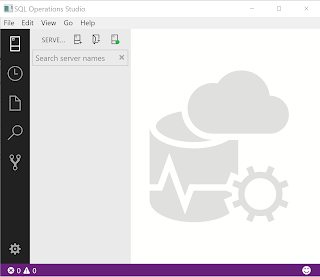
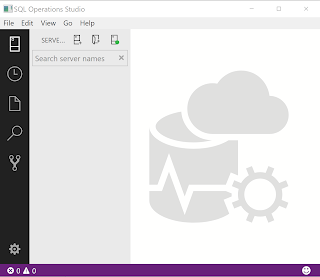
The following window is displayed:
The following icon joins the taskbar in Windows 10.
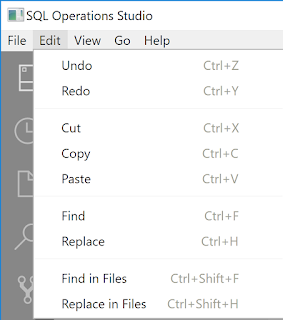
The Edit meu item is like any other Microsoft application (Word, Excel, ...)
The View menu item has many more important items such as Servers, Explorer,
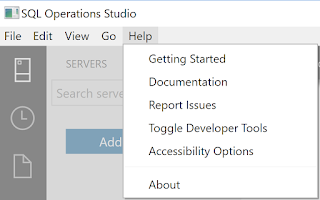
The Help menu is important as it is here you get he main documentation as well as initial knowledge for you to start using it.
SQLOPS when invoked brings up the user interface screen. It is here you do most of your development.
As mentioned in previous posts this is a light-weight tool. It provides a much easier interface then the SQL Server Management Studio, a heavy-weight option.
You invoke the program by double clicking the sqlops.exe in the folder where you saved the application files.
The following window is displayed:
The following icon joins the taskbar in Windows 10.
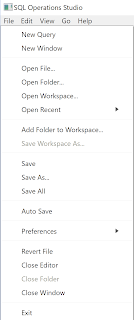
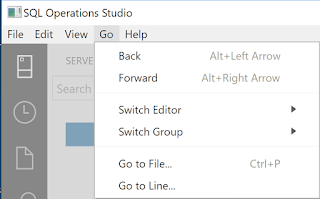
The UI is simple and the main menu items opens the following sub-menus.
The File menu item has the query related and has access to folder/file sysyem
The View menu item has many more important items such as Servers, Explorer,
The Help menu is important as it is here you get he main documentation as well as initial knowledge for you to start using it.
The icons in the panel on the left gives access to the tasks and the keyboard key shortcuts.
I think even non-DBA types can use this interface. It is cool!!
SQL Operations Studio - Light-weight database management and development tool
Well there is a heavy-weight tool, SQL Server Management Studio that is installed as a separate application from SQL Server installation (used to be a part of the SQL Server installation).
SQL Operations Studio is a lighter tool. It is free and you can carry out database development operations using it. It is available for SQL Server on Windows, Linux and Docker, Azure SQL Database and Azure SQL Data warehouse on Windows, Mac or Linux.
The preview version became available in November of 2017.
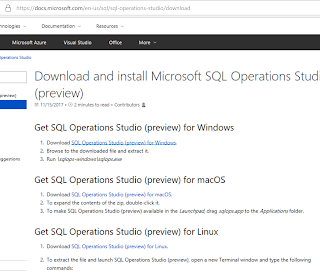
If you would like to use it you need to download the version you want from here:
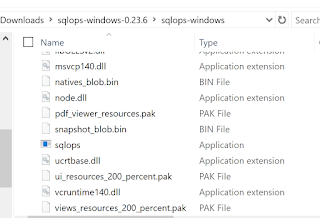
I downloaded the Windows version. You need to extract the files into a folder.
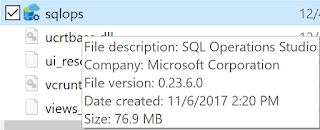
The executable is sqlops.exe and it is indeed a small file.
SQLOPS user interface in Windows 10
Monday, December 4, 2017
Installing SQL Server 2017 Developer on Windows 10
This time around it was a plesant surprise. Within a couple of clicks the default instance of SQL Server 2017 Developer is installed!!
Of course you may need to install the various other features later.
Your installation begins here by double clicking the downloaded executable.

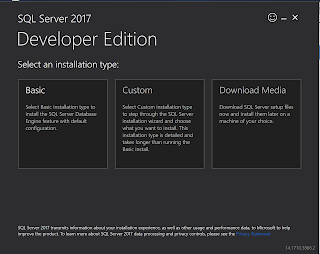
Double click the executable. Select the installation type. Of course, the Basic has been chosen here.
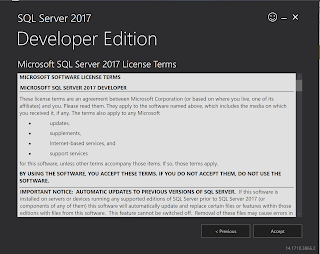
Agree to the License terms by clicking Accept.
Specify the install location. Here the default is accepted.
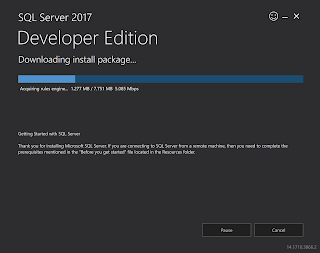
Downloading of installation package beings. This will take some time which depends on your connection to Internet besides others.
Still downloading the package....
Voila! It is installed.
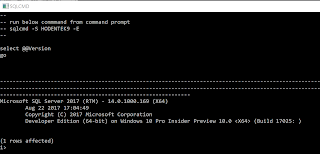
You could look at a few things on the above screen. I tried to connect by clicking Connect Now at the bottom and here is a response from SQLCMD.
However when I clicked the SQL Server Install Log folder, the screen froze and I had to reboot. The last part is my experience and yours may be different. Perhaps it does not work well with Build 17025.rs_prerelease Insider Preview version of Windows.
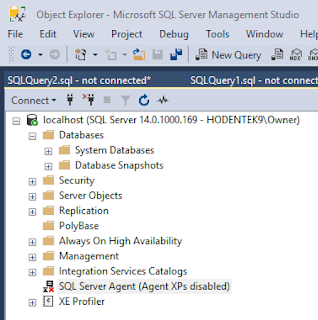
Here is the default installation in SSMS 2017 object explorer:
Of course you may need to install the various other features later.


Double click the executable. Select the installation type. Of course, the Basic has been chosen here.
Downloading of installation package beings. This will take some time which depends on your connection to Internet besides others.
Voila! It is installed.
You could look at a few things on the above screen. I tried to connect by clicking Connect Now at the bottom and here is a response from SQLCMD.
However when I clicked the SQL Server Install Log folder, the screen froze and I had to reboot. The last part is my experience and yours may be different. Perhaps it does not work well with Build 17025.rs_prerelease Insider Preview version of Windows.
Here is the default installation in SSMS 2017 object explorer:
Sunday, December 3, 2017
Download SQL Server 2017 Developer Edition and test drive
You may download SQL Server 2017 versions from here.
Download link:
https://www.microsoft.com/en-us/sql-server/sql-server-downloads
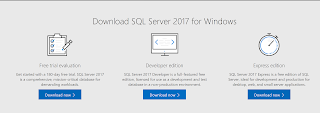
Three options are available as follows:
Trial (time limited enterprise edition)
Developer
SQL express
DownlaodSQLServerDev2017_00
DownlaodSQLServerDev2017_01
DownlaodSQLServerDev2017_02
Industry-leading performance
Take advantage of breakthrough scalability, performance, and availability for mission-critical, intelligent applications and data warehouses.
Least vulnerable
Enhance security with encryption at rest and in motion. SQL Server is the least vulnerable database over the last 7 years in the NIST vulnerabilities database.
Real-time intelligence
Reason over any data and gain transformative insights for your business with real time analytics at up to 1M predictions/second.
End-to-end mobile BI
Transform data into actionable insights. Deliver insights on any device online or offline at one-fifth the cost of other self-service solutions.
Any application, anywhere
Build modern applications using any data, any language--on-premises and in the cloud, now on Windows, Linux, and Docker containers.
Languages
English, German, Spanish, Japanese, Italian, French, Russian, Chinese Simplified, Chinese Traditional, Portuguese Brazil, Korean
Editions
SQL Server 2017 | 64-bit ISO for Windows
SQL Server 2017 | 64-bit CAB for Windows
Other Distributions:
Windows Container Image on Docker Hub: https://hub.docker.com/r/microsoft/mssql-server-windows/
Linux: SQL Server 2017 on Linux and Windows page.
Tuesday, November 28, 2017
Creating a default System Versioned Temporal Table
Let us take the example of tracking the age and height of students who spend a couple of years and are montiored periodically. We can track the montiored parameters using a temporal table.
Creating a temporal table with default history table is convenient option for creating a history table with default configuration.
The Important keyword is System_Versioning. It has two values, ON or OFF. When you set it to ON, the default history table will be created.
The following code creates a temporal table with hsitory table explicitly defined.
---------
USE [Aloha]
GO
CREATE TABLE [dbo].[StudentMonitor]
(
StudentID int Not Null Primary Key Clustered,
LastName varchar(25) Not NULL,
Age float NULL,
Height float NULL,
SysStartTime datetime2 GENERATED ALWAYS AS ROW START NOT NULL,
SysEndTime datetime2 GENERATED ALWAYS AS ROW END NOT NULL,
Period for SYSTEM_TIME(SysStartTime,SysEndtime)
)
With (SYSTEM_VERSIONING=ON (History_table=dbo.StudentMonitor_History))
In the table that is generated the SysStartTime and SysEndTime will be hidden. The period of time is determined by Start Time and end Time.
The highlighted items in the code are required to create the temporal table.
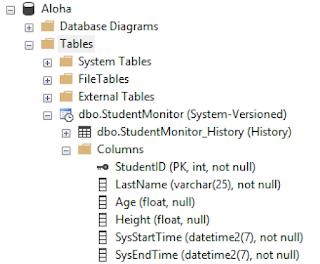
When this statement is run in a query window, the System Versioned table (dbo.StudentMonitor(System-Versioned)) as well as the history table(dbo.StudentMonitor_History)) will be created as shown.
Temporal_Table_OO
Monday, November 20, 2017
Report Builder reinstall does not help
Report builder was completely removed. Computer restarted and Report Builder was installed again. The previous install had upgraded a slightly earlier (probably that came with SQL Server 2014) and I had assumed that might have been the problem.
Report Builder UIs still have the same problem.
The computer is running Windows 10 Professional with this version of OS:
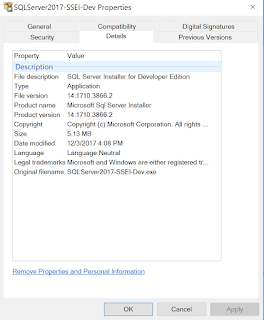
This following file version works and the report builder's Expression Builder has all the controls.
Report Builder UIs still have the same problem.
The computer is running Windows 10 Professional with this version of OS:
This following file version works and the report builder's Expression Builder has all the controls.
Sunday, November 19, 2017
Binary images in tables and Power BI
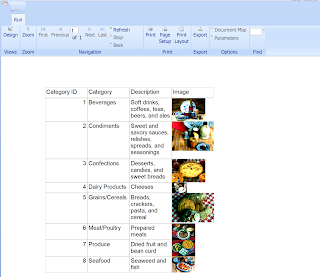
I have tried couple of times to display a table with a column containing images (binary) such as those you find in the Employees and Categories table in Northwind database. Power BI does not seem to support binary files.
For Power BI to claim superiority over competitor products Microsoft should come up with a fix to do it easily (not some programmatic trick). After all the strength of Power BI is its ease of use.
In my books on Reporting Services I did manage to display using a complicated expression using the expression builder. I am not sure whether such an approach would work in Power BI. I will try it sometime.
Images from Categories table in a Report Builder authored report:
For Power BI to claim superiority over competitor products Microsoft should come up with a fix to do it easily (not some programmatic trick). After all the strength of Power BI is its ease of use.
In my books on Reporting Services I did manage to display using a complicated expression using the expression builder. I am not sure whether such an approach would work in Power BI. I will try it sometime.
Report Builder 3 has UI problems that needs addressing
User Interface is very important to a graphical tool such as Report Builder. I have been using since the earliest version.
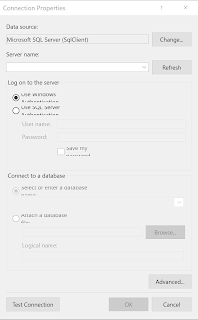
This version of Report Builder 14.0.609.142 seems to have UI problems. It is not related to resolution and I think it is in need of rework.
Here how the UI to create a connection to a SQL Server using Report Builder 3. Here you can see the whole UI (all buttons), the intermediate elements are messed up.
Expression is often used in Report Builder to fashion some relevant expression. In Report Builder 3 version 14.0.609.142, there is no OK button to submit your expression to be processed. Also the window is inflexible, bad design. Even the Help button is only partially visible.
This is not related to resolution as I have tried to see how it looks at different resolutions and even in Landscape/Portrait views. If the OK and Cancel buttons did exist they would have been aligned with the half-showing Help button.
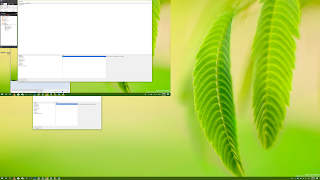
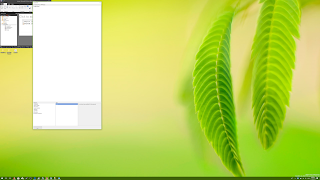
Few more images at different display settings:
Subscribe to:
Posts (Atom)
I am not paying this invoice. I am disregarding it, becuase....
I am not paying this invoice because MICROSOFT has not provided me with a satisfactory way to access my account since June of this year des...

-
Parsing a JSON object using PowerShell can give quick and fast results without too much coding and navigating objects and this is especiall...
-
Although some of the new connectors are generally available, some are in BETA. Here is a complete picture of the data connectors available...
-
Linked servers offer the following advantages as noted in MSDN documentation: •The ability to access data from outside of SQL Server. •T...

