Monday, February 6, 2017

Back-end database with Appery.io - Part 1

Apps with database back-end are at the center of enterprise applications. Appery.io provides means to create a database as well as work with many other databases as well. Appery.io can connect to SQL Server, Azure SQL Database, Oracle etc.

In this post the procedure to create a simple database followed by adding a column and couple of columns is described. In so far as database is accessed by client using server side code, the Appery.io's interface is used to create server side code and testing it using the same interface.

In the next post we  consider connecting to a SQL Database.

You can start here if you like. You may have to insert your credentials.

https://appery.io/database/

This opens the Appery.io page as shown.


ApperyIO2_0

 Creating a database:

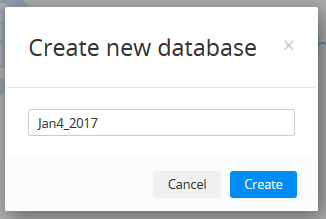
Click Create new database.
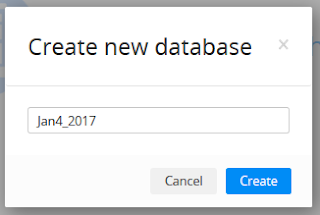
 In the Create new database window provide a name such as the one shown and click Create.
 ApperyIO2_1

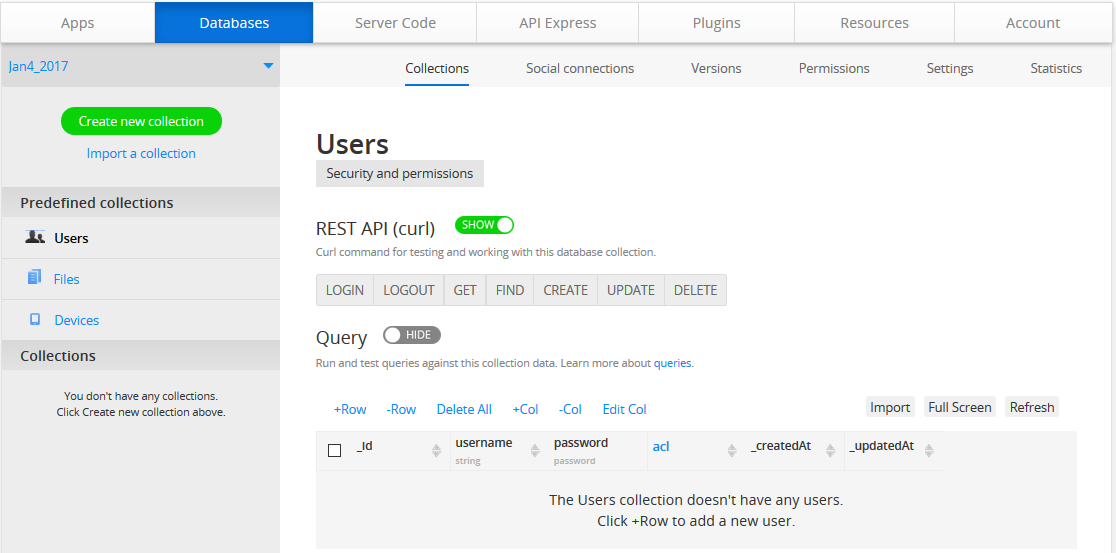
After a little while you should see this web page.
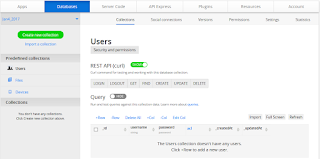
 ApperyIO2_2

Creating a Collection:
Jay4_2017 database data will be held in a Collection.
Click Create new collection.


ApperyIO2_3.PNG

Enter a name for the collection, say Goods and Click Add.

The Collection page for Goods is displayed as shown.


 ApperyIO2_4.PNG

The new collection has a user interface for adding,deleting, columns, rows and editing them

Creating a Column:

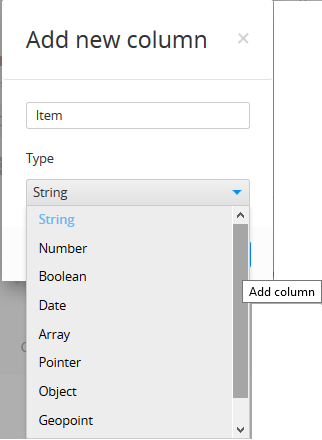
Click +Col to display the Add new column dialogue as shown.

ApperyIO2_5.PNG 

For Name enter Item and keep Type as string. You can also choose any of the other available type.

ApperyIO2_6

Click Create column.

Column gets created as shown. The collection has no data but has a column named Item.

 ApperyIO2_7

Populate the column with data by adding a row:
Click +Row 
 ApperyIO2_8

The pages is refreshed to show an interface to add a row. For item field insert Cold drink. Click +Row to add more columns.

 ApperyIO2_9

 This is all for now. The database has one column containing 3 rows of data of type String.
The database is accessed by clients using Server Code.

This is how you create server code:

Click Server Code button to open the interface as shown.

 ApperyIO2_10


Presently there are no scripts. Click Create script button to open the following page:


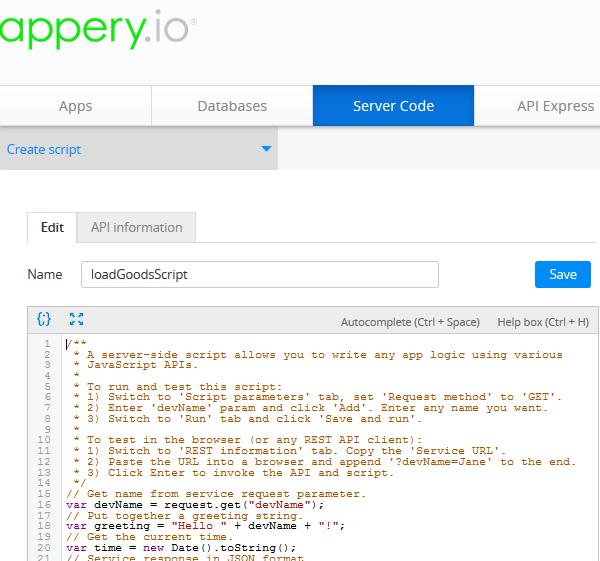
 ApperyIO2_11

Provide a name for the script- loadGoodsScript
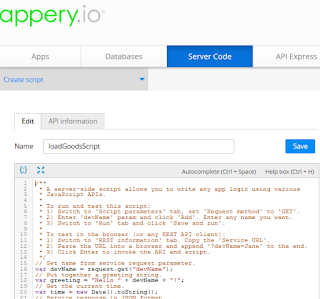
 ApperyIO2_12

Click Save.

Under Snippets on the right hand side locate retrieveAllObjects as shown.


 ApperyIO2_13

 Click insert to insert the snippet (template code) as shown (you may have remove the existing code in the script editor).

 ApperyIO2_14

dbId and collectionName are place holders and you need to find these to provide.
Click Save.

Finding dbID:

Go to Database and click Jan4_2017 database. In the Databases page locate Settings as shown here.

 ApperyIO2_15

 Click Settings.

Database settings will be open as shown.

ApperyIO2_16 

Read the Session expiration information.
copy the API keys
APIKey: xXXXXXXXXXXXX

The loadGoodsScript should appear as shown.


ApperyIO2_17 

Insert responseSuccess snippet from Snippets. The script editor should appear as shown.


 ApperyIO2_17b

Click Save.

You are ready to test the database.

Testing the Collection:

In the Server Code page click Save and Run  and return. You get the following response.


 ApperyIO2_18

It returns the entire collection in JSON format as shown above.


Friday, February 3, 2017

Importing a text file into MS Access without errors - Part 2

In the previous post we saw that the wizard imports a text file with errors. In particular the columns with time related data were not imported.

In order to import correctly without errors you may need to pay attention to the default format of the OrderDate and RequiredDate columns.

During importing the FFD.txt when you come to this step of the wizard:


AccTxtImportJan3_00

You notice that the date columns contain duplicates of data. Change the Indexed field as shown(change to Yes(Duplicates OK)):


AccTxtImportJan3_01.png

Click the Advanced... button at the bottom of the above screen.

This displays the FFD Import Specification as shown.

AccTxtImportJan3_02.png

Change the Date Order to YMD (from MDY)
Change the Date Delimiter to - (from /)

Click OK.
Click Next.

In the next screen of Import Text Wizard allow Access to add Primary Key.

Click Finish.
The data is imported without errors as shown.


AccTxtImportJan3_03.png

Looks like the time information did not come through. This is because they are all zeros.

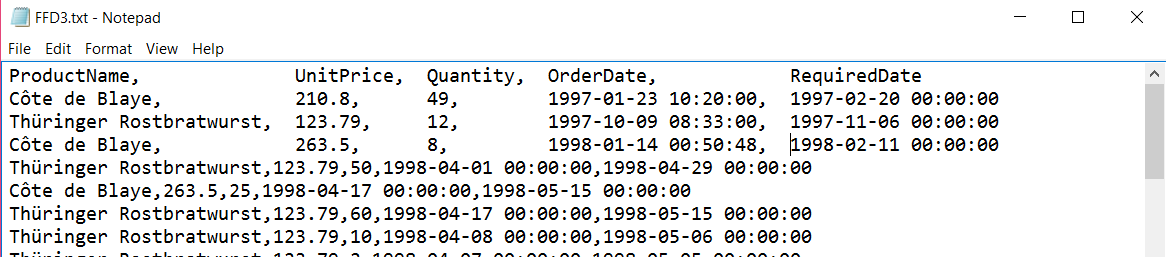
I just added a time information for the first three records in the order date and renamed the text file to FFD3.txt.


When this was imported following exactly the same steps as before the time information was also imported as shown.


AccTxtImportJan3_04.png

Access has the right tool to import the text file except that close attention must be paid to the data that is imported.

Thursday, February 2, 2017

Differences between datetime and datetime2 formats in SQL Server

You can evaluate GetDate() function in SQL Server 2012 to see the default format of datetime as shown.


Date related data in SQL Server 2012 by default is of datetime format. There are two types of datatime in SQL Server, the datetime and datetime2. The date data type does not have any information on time. You can create a column with datatype time or datetime or datetime2 as shown.


Now, what are the differences between datetime and datetime2?

The syntax is different; the date range is different and dattime2 can have higher number of decimal seconds.

Syntax: datetime
date range: Jan 1, 1753 to Dec 31, 9999
Time range:00:00:00 through 23:59:59.997
Default value:1900-1-1 00:00:00


Syntax: datetime2[fractional seconds]
date range: 0001-01-01 through 9999-12-31
Time range:00:00:00 though 23:59:59.0000000
default fractional seconds 7
Default value:1900-01-01 00:00:00

Here is an example of using datetime2:


The ISO 8601 format is: 2004-05-23T14:25:10.487
where T is start of time format

Importing a CSV text file into MS Access - Part 1

Importing a text file into MS Access very easy as it is completely wizard driven. But the text file needs pre-processing before importing as a text file has only one data type for any of the columns imported. When you generate a text file
The version of MS Access used is Microsoft Access 2016 MSO 32-bit which is a part of the Office 365 subscription.

The import is completely wizard driven as you see in the following steps. I will be using the same text file that I generated from the Norhtwind database on my SQL Server 2012. The details of this are available in this post.

This post considers importing a text file into  MS Access table using Wizard and the type of error produced.

The following query was used to provide the data for the text file:
=====
SELECT Products.ProductName, [Order

Details].UnitPrice, [Order Details].Quantity, Orders.OrderDate, Orders.RequiredDate
FROM     [Order Details] INNER JOIN
                  Orders ON [Order Details].OrderID = Orders.OrderID INNER JOIN
                  Products ON [Order Details].ProductID = Products.ProductID
Where [Order Details].UnitPrice>100

====
This is a sample of the file FFD.txt generated (just two rows reproduced).
ProductName,                   UnitPrice,  Quantity,   OrderDate,                   RequiredDate
Côte de Blaye,                  210.8,         49,            1997-01-23 00:00:00,  1997-02-20 00:00:00
Thüringer Rostbratwurst, 123.79,       12,            1997-10-09 00:00:00,  1997-11-06 00:00:00

The next images show the various steps of the wizard:

Highlight the default table Table 1 and right click to access the import of a text file as shown below.


 The Get External Data - Text File is displayed as shown. Accept the default to import the text file to a new table in the current database option after Browsing to bring in the FFD.txt file stored in your folder / file system.


The data is immediately (small sample) brought into the Import Text Wizard as shown.

 Accept the first option as the file is comma delimited. Place check mark for 'First Row Contains Field Names'.  


Click Next. Click Advanced to see the field specification. Click OK.

Click Next.  Allow Access to provide a Primary Key
 Provide a name for the new table.

 Click Finish. The import is finished and you can save the steps you took to import. As you can see there were data that did not come through cleanly and there were import errors.


MS Access created two tables, the table in which successfully imported data was saved and another table with _ImportErrors appended containing the fields that did not make as shown.


This is not a successful import of the data as two of the columns did not make it to the import. In Part 2 modifications to the import process that would bring in the data correctly.

Tuesday, January 31, 2017

Importing a CSV file into SAP's SQL Anywhere 17

Importing data in csv files, from excel files and web pages are often required. Each software vendor have their own tools to import such data. In SAP's SQL Anywhere 17 you can import data in text files using the Interactive SQL tool.

For working with this post it is assumed you have installed SAP's SQL Anywhere 17 and you have an available csv file. For this post I will be using a text file created using the export-import wizard tool from a table in the Northwind database on a SQL Server 2012. You can of course use a suitable text file. Generating the FFD.txt file is described here (http://hodentekmsss.blogspot.com/2016/12/creating-csv-file-from-sql-server-2012.html).

The following is the procedure to import the text file into sql Anywhere 17.

From All Programs in Windows 10 click on Interactive SQL under SQL Anywhere 17.


This brings up the window 'Connect to a SQL Anywhere Database'.

Fill in the authentication information (dba\sql) and click Browse on the ODBC Data Source name and pick SQL Anywhere 17 Demo.

Click Tools and Test Connection to ensure you are connected.


SAP_1

Click Connect and you are connected to the demo database. Your personal server is running now as shown.

SAP_2


The Interactive SQL window should now be up with connection established to the demo database as shown.

SAP_3

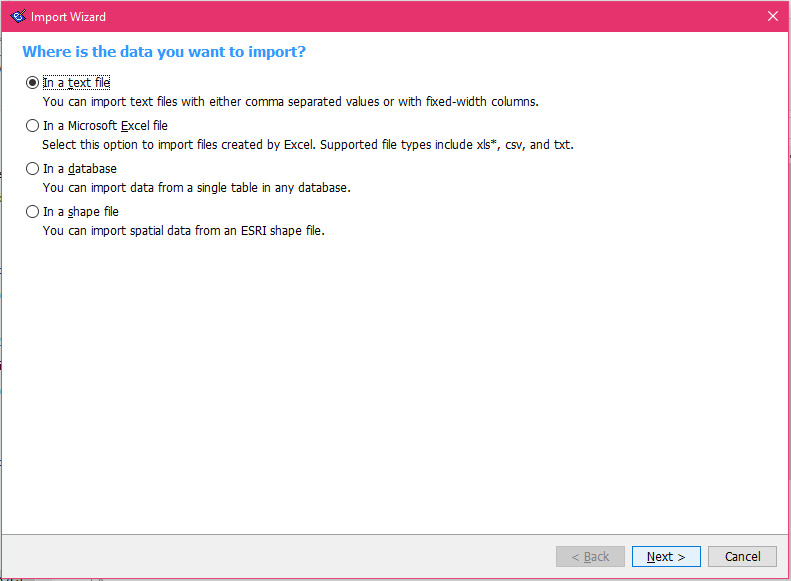
Click Data | Import... to open the Pop-up window Import Wizard as shown.


SAP_4

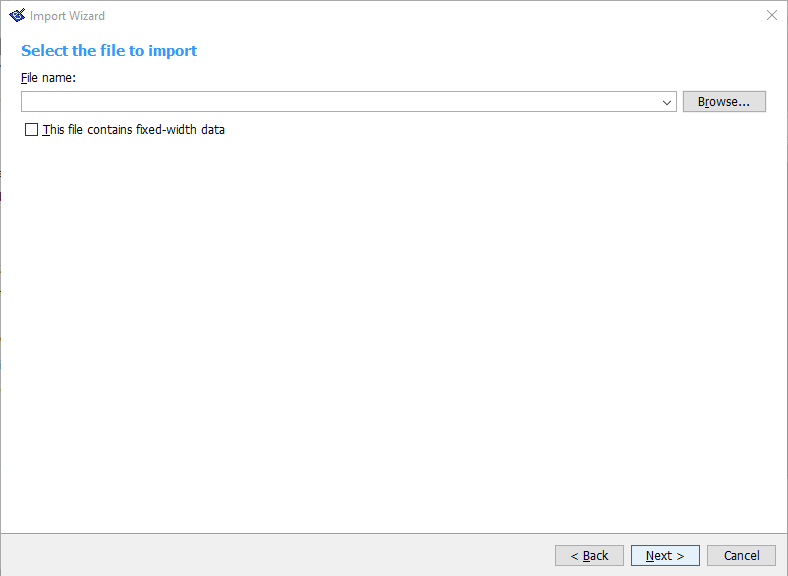
Choose the default 'In a text file' and click Next to open the 'Select the file to import' page of the Import Wizard as shown.

SAP_5
Browse and locate the text file on your computer.

 Click Next.

Click Next.  In the next window use Comma as the field separator and insert check mark for 'The first line contains column names' as shown.

Click Next. The 'Use this panel to associate a database column with each imported column. Change datatype of the two date columns to 'time' from 'varchar'. You may highlight a column and change the data type, if it is not what you want. Here in is the drop-down for the Order Date.


Click Next. The "Where do you want to save data?" window is now open with two options. Choose to get the data into a new table and change default name of table to FFDImport. 

Click Import. The data gets imported.


The text data gets imported into the table FFDImport.

Close the Import Wizard.

The Interactive SQL window shows the SELECT * from the new table as shown.

SAP_11

Although the import was successful, the time related columns did not come through correctly. In the next post we shall see if we can correct this. For this post the 'varchar' data type for the OrderDate and RequiredDate were replaced by the 'time' data type in the Interactive SQL's, import data wizard.

The table is now visible in the SQL Explorer as shown.

SAP_12.png


Saturday, January 28, 2017

Hands-on Learning Event in Honolulu 1 : Introduction to Structured Query Language


Course summary:

Databases - organized repositories of information have become indispensable. Knowledge of databases is a must for professionals and in fact even more relevant since the emergence of Big Data in today's world.

In this introductory course you will learn all about relational databases and the basics of Structured Query Language (SQL) including sorting; grouping result sets; using DDL, DML, DCL, and TCL. All SQL statements will initially be written for one table. Most practical, modern and relational databases will include a large number of tables and SQL queries have to access information from several tables. This course will then introduce you to querying more than one table. With this skill you will be able to query two or more tables in a database. This is a hands-on course which will take you from installing SQL Server 2016; learning the ins and outs of SQL Server Management Studio and of course a full dose of SQL. You will be both coding as well using Graphical User Interface during this training.

During each meeting the students will be assessed for their knowledge, competency and proficiency in SQL.

Session start date and time: Feb 16 - March 23, TTH 5:30pm - 7:30pm 10 Meetings


Microsoft SQL Azure Database: SQL Server in Microsoft Cloud
Windows PowerShell for SQL Server
SQL Server 2016


You may also contact the instructor: hodentek@live.com

When Identity Security Becomes a Wall — Not a Shield

After a breach that forced a reset of my digital identity, I hit a roadblock I never anticipated: multi-factor authentication (2FA) locked m...