Showing posts with label Power View. Show all posts

Wednesday, July 29, 2015

Microsoft Power BI enters a new phase with recent release

PowerBI 2.0 was released recently (http://blogs.msdn.com/b/powerbi/archive/2015/07/24/power-bi-is-generally-available-today.aspx).  According to the link there appears to be two items, Power BI Service and Power BI Desktop. Power BI Visualization framework and its library will be available on GitHub as well. Microsoft seems to have included an unbelievable sources of data which you can use to create and enjoy your visualization (Review screen shots at the conclusion of this post).

Review articles on\using previous version here:

Power BI Unchained
http://hodentek.blogspot.com/2015/02/power-bi-unchained.html
Spin out a cutting edge report with Power BI
http://hodentek.blogspot.com/2015/02/spin-out-cutting-edge-report-with-power.html
Visualizing data on SAP's SQL Anywhere
http://hodentek.blogspot.com/2015/02/powerbi-preview-reporting-from-sql_13.html
Excel data visualization with Power BI
http://hodentek.blogspot.com/2015/02/powerbi-preview-reports-using-data-on.html

Power BI Service: Cloud Hosted Bi and Analytics
Power BI Service download is from this link.
https://powerbi.microsoft.com/?WT.mc_id=Blog_GA_James

I used Sign-in on the above linked page with my personal live.com acccount. It appears you cannot use just your Microsoft account (that anybody can get for free) but the Office 365 or enterprise account.

PowerBI_01

However this did not work for me. I am trying to resolve this issue with Microsoft.
Well, the mantra, 'five seconds to sign up, five minutes to WOW' did not work for me. I shall WOW later.

Installing the Power BI Desktop

Power BI Desktop can be downloaded from here:
https://powerbi.microsoft.com/desktop

Install double clicking the Windows Installer Package PBIDesktop_x64 (55.6MB).


PBIDesk02.png
Agree to licensing terms. Accept default location. After one or more screens page with Install button will be displayed. Click Install. User Control Access window is displayed. Click OK. Progress page is displayed.

PowerBI Desktop is installed quite rapidly.
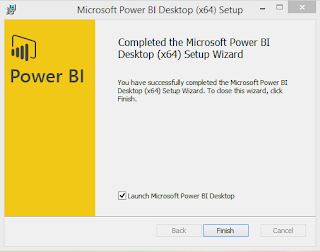
PBIDesk06.png

A new desktop icon replacing the one from the preview version is created.

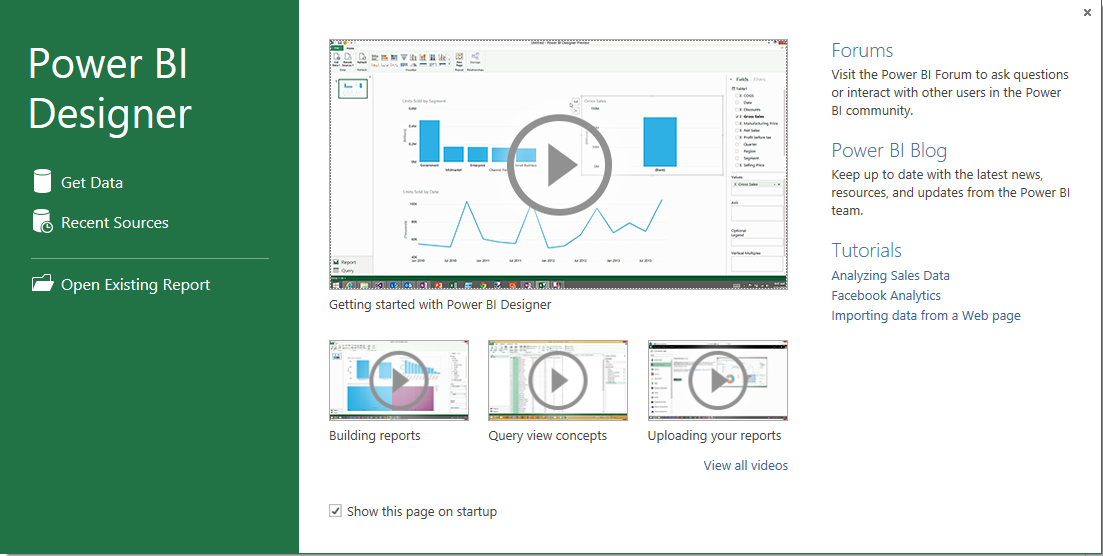
Launching the application displays the following window.
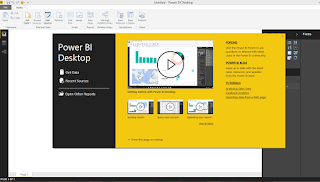

PBIDesk07.png

 
Dismiss the start up screen and you will see the Power BI Desktop with the 'ribbon'.
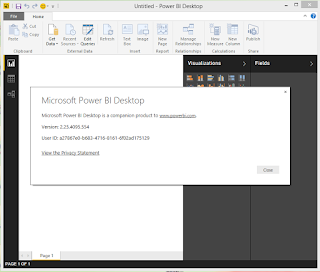
PBIDesk08.png

Happy Visualizing Data!

How does this stack up against Tableau and Qlik?

Sources of data which you can use to create your visualization

These are the most popular data sources:

PBI_getData1

Here is the complete listing

 PBI_getData2
 PBI_getData3


Tuesday, February 10, 2015

Authoring a report with Power BI using SQL Server 2012 data

This post provides a tutorial approach to authoring a report with Microsoft PowerBI using data on a  SQL Server 2012.

PowerBI is Microsoft's preview software that you can download for free if you are in USA. Probably it will be available to users in other countries as well. It is the latest iteration to provide a toll to the
non-programmer type who desires to create Ad-hoc reports easily without knowing too much of the innards of the data source but knowing all about their business.

Read here for more information:
http://hodentek.blogspot.com/2015/02/power-bi-unchained.html

Before you start authoring the report make sure your SQL Server is running and that you have downloaded and installed the PowerBI software from this location: http://www.powerbi.com/
The installation is very simple and takes only 4 interactive screens.

 
After the download PowerBI gets launched.


PowerBI08.png

On the left you have a navigation pane. You can click on the link and get to the task you want to accomplish. In the right hand pane you have a video you can watch to get started and a few other videos. You also have access to the forums; the PowerBi blog and several tutorials. You may
also opt out to not show this page in subsequent launches,

Click on Get Data. The Get Data page gets displayed as shown.

PowerBI09.png

Notice that you can also access data on your Azure as well as quite a large selection of data sources. The picture shows only half the resources. Scroll down and review the rest.

In this post, you will be connecting to an instance of SQL Server 2012 that contains a AdventureWorks2012 database.

Click SQL Server Database in the above image. You will be displayed a page with ttle Microsoft SQL Database and you will be importing data from a Microsoft SQL Server Database. As I mentioned earlier I will be getting data from an instance of SQL Server called RegencyPark. I will have to give the complete reference to this instance. Since my laptop is named Hodentek8, the complete refeerence is Hodentek8\RegencyPark and the name of the database I will be using.

PowerBI10.png

Click OK. You get the 'Access a Microsoft SQL Database' page displayed.
PowerBI11.png

Herein  you need to provide authentication information. Windows authentication was used during installation and so just click Connect at the bottom of the screen.

You will be displayed the Navigator pane showing all the tables in your
database as shown.

PowerBI12.png

Clicking on any of the tables you can see the details for that table in the Preview is Blank area as shown. If you remember a table name you can also search.
PowerBI13.png

 
You can select multiple tables to create a report. Here to keep it simple I have chosen the Sales.vSalesperson table and you can see a blank report shown as a rectangle bordered green.


PowerBI14.png
The designer has the typical Office look with Menu and toolbar menu. You can also see various  charts design templates for data visualization.
Click Load. You may also use the GetData and Recent Resources links to get
the data.

Hidden behind the image on the top of the above screen you will also find Fields pane at extreme right. It lists out all the columns in the Sales.SalesPerson table. Use the scroll-bar to see more of the fields.

In the fields pane I choose Last Name, SalesLastYear, SalesQuota and
Sales YTD and voila the report is generated. I could choose to create the type chart I like by choosing in the menu bar.


PowerBI16.png

I can immediately create another report (a new one) by choosing other different fields (TeritoryName, SalesYTD and SalesLastYear) as shown here. I need not get out of the designer and the first report also exists to which you can switch into by clicking on it. This is very much like Power View introduced in SQL Server Reporting Services 2012.


PowerBI18.png

That's all. No calculating X-axis, Y-axis etc. The type of tasks you do with Excel. This is as simple as it can get. I took a whole page to describe and I bet you can do it in 10 minutes.

A summary veriosn was presented here:
http://hodentek.blogspot.com/2015/02/spin-out-cutting-edge-report-with-power.html


Friday, January 3, 2014

Connecting to SQL Server 2012 Express from Power Pivot - 1

Previously we have seen connecting to a database from Power Query. Microsoft also has Power Pivot which also can access SQL Server 2012 to model a data source. In what way is Power Query different from Power Pivot?

There is a functionality difference between the two. Power Query is more like SQL Server Integration Services while Power Pivot is akin to SQL Server Analysis Services. Even a cursory look at the
'ribbon' would reveal this as shown:


In Power Query UI you do not see analysis related controls.

As to connecting to data you do see there is some overlap. However, Power Query can access lot more types of data sources than Power Pivot.  These are data sources that Power Query can access,


The following image shows data sources that Power Pivot can bring in,

 Also, review the user interface differences between the two tools, one provides more analytical support than the other,

However both Power Query as well as Power Pivot can connect to SQL Server 2012 Express by clicking on the From Database drop-down.

Go to Part 2 here:


Friday, December 20, 2013

Querying SQL Server 2012 with Power Query

Power Query is a great way to access data and Power View is a great way to view a report.

Some details of Power Query can be found here,
http://hodentek.blogspot.com/2013/12/what-is-microsoft-power-query.html
http://hodentekhelp.blogspot.com/2013/12/what-is-difference-between-ms-query-and.html

Power View is covered in detail in my book,


This post shows how you may connect to SQL Server 2012 Express and query the databases therein using Power Query.

Step 1. If you have not installed the add-in do it now. Get it from this link here,
http://www.microsoft.com/en-us/download/details.aspx?id=39379

Step 2. Launch MS Access 2010 ( or your version). You should see in the splash screen that the add-in is also loaded.

Step 3. Anyway verify it from the Excel Options window that you can access from File menu as shown.

Step 4. Click menu item Power Query followed by From Database as shown.


Step 5. Click From SQL Server Database. In the window that pops-up type in the server name as shown. There is no browse feature here, you have to manually enter as shown.


Step 6. Click OK after entering SQL Server name and the following window pops-up.


Step 7. You can choose encrypted or unencrypted for you connection. Here Unencrypted is chosen.

Step 8. Click Save. The query window appears with a default name Query1 as shown. Here Northwind has been expanded to show the tables.


Step 9. Click on Categories as shown. The table content gets shown on the right side.


Step 10. You can further process the query using the built-in controls which can be displayed by right clicking the corner of the table as shown.


Step 11. The chosen options updates the steps, each time you make a choice a step is added as shown. Note that this next query is from AdventureWorksLT2012 database.


This will be saved to the workbook which you may name appropriately by completing this window. Right now there is no link to publish this result except saving it to the SkyDrive and use it later.

Enjoy

Tuesday, November 12, 2013

Download this SQL Server 2014 CTP2 Reporting Services Add-in to integrate with Microsoft SharePoint


Report Integration for SQL Server 2012 and SharePoint 2010 was described comprehensively in my latest book:

The new features Power View and Data Alerts were treated in two complete chapters:

Chapter 6: Power View and Reporting Services
Six hands-on exercises

Chapter 7: Self service Data Alerts in SSRS 2012
Three hands-on exercises

The SharePoint 2010 used in the book should work equally well with SQL Server 2014 CTP2.

SQL Server 2014 CTP1 installation was described here.
http://hodentekmsss.blogspot.com/2013/09/installing-sql-server-2014-ctp1-on.html

Programs have been updated and new versions have appeared.
SQL Server 2014 is now in CTP2

Now how does one start working with features like Power View and Data Alerts?

You need to install and work with recent versions.

You need the following :
Microsoft® SQL Server® 2014 Reporting Services Add-in for Microsoft SharePoint®, Community Technology Preview 2 (CTP2)

You can download the above from here:
http://www.microsoft.com/en-us/download/details.aspx?id=40738

Details from the above site are here:

·         The SQL Server 2014 CTP2 Reporting Services Add-in for Microsoft SharePoint technologies deploys the Reporting Services user interface pages and features on a SharePoint web front-end server.


After you install the Reporting Services Add-in and configure your servers for integration, you can publish Reporting Services content to a SharePoint library and then view and manage those documents directly from a SharePoint site. The Reporting Services Add-in provides the following functionality:

      • Power View, a feature of Microsoft SQL Server 2014 CTP2 Reporting Services Add-in for Microsoft SharePoint Server 2010 Enterprise Edition, is an interactive data exploration, visualization, and presentation experience. It provides drag-and-drop ad hoc reporting for business users such as data analysts, business decision makers, and information workers. Power View reports are in a new file format, RDLX.
      • Open reports in Report Builder from a SharePoint library, and save reports to SharePoint libraries.
      • A Report Viewer Web Part, which provides report-viewing capability, export to multiple rendering formats, page navigation, search, print, and zoom.
      • SharePoint web pages so that you can create subscriptions and schedules, and manage reports and data sources.
      • Support for standard SharePoint Foundation 2010 and SharePoint Server 2010 features including document management, collaboration, security, and deployment with report server content types.
      • The ability to add the Reporting Services Report Viewer Web Part to any page or dashboard on a SharePoint site and customize its appearance.
      • The ability to use SharePoint permission levels and roles to control access to report server content. You can also use SharePoint forms authentication to support access over Internet connections.
      • Reporting Services data alerts, a data-driven alerting solution for SharePoint Server 2010 Enterprise Edition that informs you about changes in report data that are of interest to you, and at a relevant time.


Tuesday, July 9, 2013

Map, Data Bar. Sparkline and Indicator in Report Builder 3.0

In Report Builder 2.0 there were Charts and Gadgets as shown in the following figure of the Ribbon. . They were classified under Data Regions.


These were fully discussed in my two popular articles.

http://dotnet.sys-con.com/node/982742

http://jayaramkrishnaswamy.sys-con.com/node/1227111

and from my book, first edition of my book on reporting services,


Report Builder 3.0 surfaced with SQL Server Reporting Services 2008 R2. From Report Builder 2.0 to Report Builder 3.0 a few more items have been added to make data visualization more interesting (Map, Data Bar. Sparkline and Indicator) These elements are shown in the following screen shot of the ribbon in Report Builder 3.0. Now they are part of the Data Visualization.


How do you get them on to your report?

Very easy!!!!.

Right click a data region on a table and click insert as shown. Also you may directly click the menu item Insert and pick the visualization you want to add.


The following post shows how you may add data bars easily and how they are related to your experience in MS Excel. Data bars are very similar to conditional formatting in Microsoft Excel.

http://hodentekhelp.blogspot.com/2013/07/what-are-data-bars-in-sql-server.html

You can jump start on using all the data visualization options in Report Builder 3.0 as well as Power View in my new book on SQL Server Reporting Services.


http://goo.gl/aXPZU

Mahalo,

Jayaram Krishnaswamy

Wednesday, July 3, 2013

First step in report authoring: Connecting to a source of data

Report authoring is perhaps one of the most frequently required activities in an enterprise. Knowledge of report authoring is an invaluable asset when one is looking for a job in an enterprise. Before you can write a report you will have to know where your data is and how to get connected to it from your authoring software. Report authors who are not very comfortable with using data on a back end server could use the more powerful and highly interactive Power View reports, but this requires a developer in your organization to create a model for you to work with. Once the model in place it is super easy to create stunning reports. This is only possible on SQL Server 2012 with the reporting services installed in SharePoint integrated mode.

The following is specific to SQL Server Reporting Services, but this is important for any authoring tool. In the following Visual Studio 2012 is presumed and a web project is to be created to demonstrate the use of Report Viewer Control.

Presently the Server Explorer has the following items:


If you do not see Server Explorer you click View in the main menu and click Server Explorer as shown:


Presently there is a connection established with the Adventure Works 2012 database on the SQL Server 2012 named Kailua.

Click Connect to Server item on Server Explorer tool bar shown.


The Add Server window is displayed as shown.


The name of the computer is provided (you provide the name of your computer). Click OK.

Adding a Data Connection

Click Connect to Database toolbar item as shown.


Or you can right click Data Connection and start as well.

Assume that we clicked Connect to Database.

The Add Connection window is displayed as shown.


This is because before getting to the database you must first get connected to the server. Notice that the Microsoft SQL Server (SqlClient) is the default. It can be changed to others by hitting the Change... ellipsis button and following the wizard.

For now accept the default. Click on the handle for Server Name after hitting the Refresh button. You see three servers, a SQL Server 2012 (Kailua); a SQL Server 2008 R2 (Maui) and a SharePoint Server.


Click HODENTEKWIN7\KAILUA to choose the server. The Add Connection window is updated as shown. We accept the default authentication, Windows Authentication.


Click on the handle for the Select or enter a name for the database field to display the drop-down list as shown.

Click Northwind. It could be another database in your case. Click the Test Connection button and verify that the connection was successful as shown.


Click OK on the above message window and click OK on the Add Connection window. The new database connection will be added to the Visual Studio 2012’s Server Explorer as shown.


That is all for now.

Mahalo

My new book uses images / screenshots such as the above to guide you through the learning process. The instructions are very simple and most of the steps are described.


Friday, June 28, 2013

Do you want to learn SQL Server Reporting Services 2012 in record short time?

Learning SQL Server 2012 Reporting Services was released today by Packt publishers. This is my second book on Microsoft SQL Server Reporting Services (which may be called a second edition). It is enlarged to include Reporting Services Integration with SharePoint 2010. With 566 pages it is somewhat thicker than the first edition (Learning SQL Server 2008 Reporting Services). However, the book has a large number of screen shots like my first book and is somewhat thinner than most other books in this genre. The reviewers and technical editors have put in a lot of effort and time to make this happen.


I take this opportunity to thank the reviewers (Satya Shyam Jayanty and Ritesh Shah) for their meticulous reading of the manuscript; the technical editors, Azharuddin Sheik, Mausam Kothari, Varun Pius Rodrigues, and Lubna Shaikh and many others at Pakct Publishing for their excellent editing and Microsoft Forums' (MSDN, Technet and SharePoint) help for answering so many of my questions.

Summary of Hands-on tasks you learn:
  • Install SQL Server 2012, SharePoint Server 2010, and configure Reporting Services both native and SharePoint Integrated on Windows 7
  • Install SSDT and author reports, both local and remote, and deploy them to report servers
  • Develop desktop and web applications by using Report Viewer controls
  • Author different kinds of reports with the latest gadgets by working with Report Builder
  • Manage access to the report server, report scheduling, report delivery, report uploads, and downloads with Report Manager
  • Create Tabular Models with SQL Server Analysis Services and deploy them to SSAS Server using SSDT
  • Author Power View Reports from your SharePoint Site and export them as Power Point files
  • Learn to create Data Driven alerts in SharePoint and monitor them on SQL Agent on SSMS
  • Work with Windows Azure Reporting Services using Windows Azure Portal and SSMS
  • Write applications in SSIS and WPF to access reports and access native server reports from SharePoint Site
I hope this book is appreciated as much as the earlier one.

This book can now be bought from the publishers as well as other online book sellers:
http://www.amazon.com/Learning-Server-Reporting-Services-ebook/dp/B00DM23X5M/ref=sr_1_2?s=books&ie=UTF8&qid=1372453186&sr=1-2

If you are using SQL Server 2008 then this book is for you,

http://www.amazon.com/Learning-Server-2008-Reporting-Services/dp/1847196187/ref=sr_1_1?s=books&ie=UTF8&qid=1372453239&sr=1-1
 
The links in the book are available here:
 

When Identity Security Becomes a Wall — Not a Shield

After a breach that forced a reset of my digital identity, I hit a roadblock I never anticipated: multi-factor authentication (2FA) locked m...