Sunday, August 30, 2015

Managing relationships in Power BI

The previous version of Power BI did not correctly recognize pre-existing relationships in the tables when data was accessed from ODATA Service. The recent August 20 update works much better and was able to recognize relationships without a hitch.

This post is about accessing data from ODATA Service feed.

If you are not already having Power BI, you can access the same (review this file).

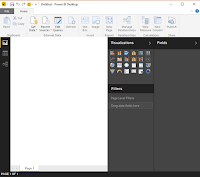
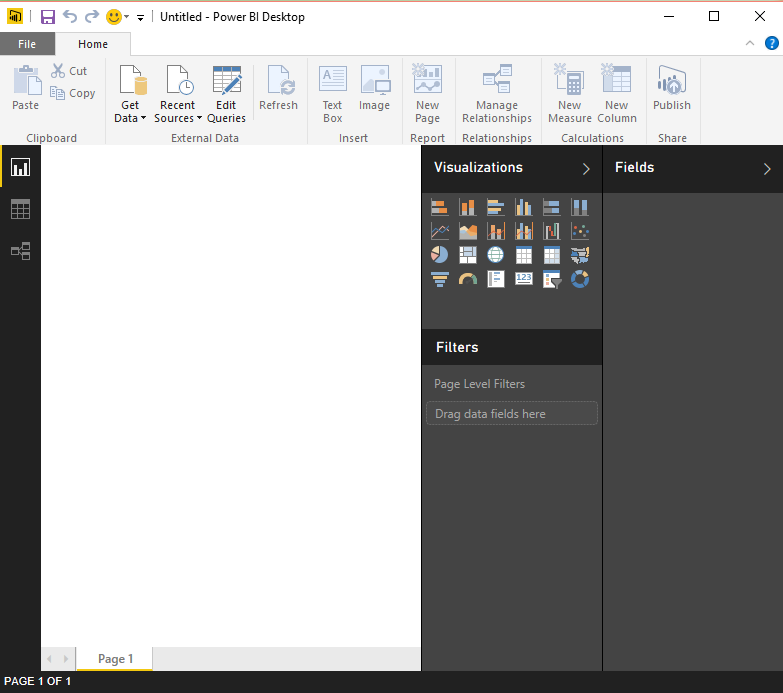
Launch Power BI and do not use the start screen. However, if you want to read about it, you can go on to the online resources. The following page will be open when you launch this application from its shortcut.


Odata_01.PNG

Click on Get Data to open the following:


Odata_02.PNG

From the drop-down list pick ODATA Feed and the following is opened. Enter the ODATA feed URL. This is a reference library feed from Odata.org and gives access to Northwind database as an OData Service.


Odata_03.PNG

Click OK. The Navigator appears on the left pane and the selected items are shown on the right pane taken one at a time. Presently nothing is selected.


Odata_04.PNG

You can chose one table or any number of tables from the tables in the left pane. When you select a table the data in the tables is displayed in the right pane as shown. My last item selected was the Products table and you see the data in the right pane. I have selected three tables for which I know beforehand that relationship between tables exists. Of course you can create relationships as well.

Odata_05.PNG

After selecting the tables click on Load and the tables are loaded as queries to the interface and you will see this transient screen providing some loading details.

Odata_06.PNG

After loading is complete, the screen changes to this. The tables appear as Fields in the Power BI's UI as shown.

Odata_07.PNG

Click on Manage Relationships in the main menu, the following page is displayed. The program has correctly recognized the existing relationships and marks them as active. These relationships can be managed by using the set of buttons in the above page, New | Autodetect..|Edit|Delete.

 Odata_08.PNG

Since it has already detected the existing relationships there is nothing to be discovered should you click Autodetect... as shown here.

 Odata_09.PNG

You can see how they are related graphically as seen here. Placing your cursor on the line joining the tables in the middle, displays how they are related.

Odata_11.png


Saturday, August 29, 2015

Hands-on Learning Event in Honolulu 2, Nov 5, 2015: SQL Server Reporting Services 2012

The class is forming and is expected to start on November 5, 2015. Please register at the PCATT.ORG site.


Adata/Pcatt1.png
SQL Server 2012 Express or Developer Edition / Evaluation edition will be used. The emphasis is on Native Mode operation of the Reporting Services.

For details you can also write to:
Hodentek@live.com with course name in the Subject line.

Here are Reporting Services books published by the instructor:


You can buy these and many other computer and programming related books here:

Friday, August 28, 2015

PowerBI is enhanced in the latest update


Not too long ago PowerBI got the GA status. You may want to read up on the following related stuff:

PowerBI and the Cloud
http://hodentek.blogspot.com/2015/08/doing-bi-in-cloud-using-powerbi-for.html

PowerBI on Gartner's Magic Quadrant
http://hodentek.blogspot.com/2015/07/qlik-is-in-gartners-bi-magic-quadrant.html

Report from SQL Anywhere 16 using Microsoft Power BI
http://hodentek.blogspot.com/2015/02/powerbi-preview-reporting-from-sql.html

Report from an EXCEL application
http://hodentek.blogspot.com/2015/02/powerbi-preview-reports-using-data-on.html

Rapid reporting with Microsoft Power BI
http://hodentek.blogspot.com/2015/02/spin-out-cutting-edge-report-with-power.html

Microsoft Intelligent System Services
http://hodentek.blogspot.com/2015/03/microsoft-azure-iot-services-update.html

Power BI Unchained
http://hodentek.blogspot.com/2015/02/power-bi-unchained.html

 A new update to PowerBI was announced recently and this is the latest update as of 8/20/2015.

These following are the advertised improvements:

  • Import Excel Power BI artifacts (Data Model, Queries, Power View) into a new Power BI Desktop file
  • HDInsight Spark connector
  • Azure SQL Data Warehouse connector
  • Support for Custom MDX/DAX queries when importing data from SSAS
  • Navigator dialog improvements: ◦Resizable Navigator dialog
  • Ability to multi-select items in Navigator (CTRL+Click, SHIFT+Click, etc.).
  • Query Editor improvements: ◦Query Group creation/deletion improvements (multi-select, etc.)
  • Ability to Split Query (i.e. refactor common base steps into a new query)
  • Query Icons to reflect type of query in Queries navigator pane
  • Data Modeling improvements: ◦Resizing of columns in Data View
  • Moving Measures from one table to another
  • Live Analysis Services Connections: Ability to change the database from Edit Queries dialog.
You can see there are plenty of things coming together and probably frequent updates keeps needed things in good focus. Since connectors are the next big thing, there are new connectors which should add to productivity.

You download the new PowerBI from the link mentioned earlier.


While using the previous PowerBI with ODATA I had experienced problems creating relationships and the auto-detect relationship feature was not working. Trying to create known relationship also produced the same errors and I believe they were related to something connected to the Analysis, or the model. I will revisit this problem and if you come back later you may find a related post.

Interestingly as soon as the error was generated Microsoft wanted to know about it and a sort of 'ticket' with all relevant information from my application was generated and mailed to Microsoft. I am sure it will be scrutinized.

Sunday, August 23, 2015

Windows 10 ODBC Data Base Administrators

In Windows 10 have access to both x32bit and x64bit versions of ODBC Data Sources Administrators. ODBC stands for Open Data Base Connectivity. You can ODBC Data Source Administrator  from Control Panel | System and Security | Administrative Tools. If you want to use them frequently you can pin them to the Start menu (you may find it not working as of now, but probably will be fixed in the future).

While the x32bit version has more drivers, the x64bit has fewer drivers as seen in the following images.

Access ODBC Data Sources from Administrative Tools as shown here. You can double click these here to open them.

 Here are the x32 bit drivers.


 Here are the x64 bit drivers.

The PDWODBC is for connecting to Parallel Data Warehouse where applicable.

Saturday, August 22, 2015

Adding a Primary Key column to an existing populated table

Primary Key is a basic requirement for establishing relationship between tables. Two or more tables are related by means of Primary Key and Foreign Key relationships.

Can you add a Primary Key column to a existing populated table?

The answer is, yes you can, you can use T-SQL code or SQL Server Management Studio to add a column. Modification of objects is at the heart of maintenance.

This post shows you how to add a Primary Key column, step-by-step. I will be using SQL Server 2012 but the procedure is similar with probably some very minor variations in other versions.

The first thing is to make sure that when you save changes the table is not recreated. You can do this by removing the check mark from here (Prevent saving changes that require table re-creation).
The Options menu is accessed from Tools | Options... .


Creating a table with three columns:

I will be creating a new table in a database Manoa in an instance of SQL Server. Using the drop-down shown you can create a new table.

 
When you click New Table... above the next pane opens in SSMS with a default table name Table_1 which can be changed to the one you give after configuring it as shown.  Enter Fname under ColumnName, then Data Type comes up as nchar(10). If it does not you can select from the list. Place check mark for Allow Nulls (which means this column may have a value or may not, it is nothing unless something is entered).

 
When you close this window, the next window is displayed.

 
When you click Yes, the above table will be saved and you get the opportunity of overwriting the default name with one of your own as shown.

'
Herein table name was changed to Client. The table Client gets created which you can see in the Table node in Object Explorer. You may need to refresh the Table node (by right clicking and choosing Refresh). The next picture shows the columns of the Client table and the columns that you added.


Populating the table with 3 rows

Right click dbo.Client under the Tables node. From the drop-down select 'Edit Top 200 Rows '.  The next window will be displayed with just the first two with all Nulls. Enter the names by clicking on the Nulls under Lname; then under Fname and then under age. When you finish the 1st row, the second row is displayed again with Nulls. Repeat the above using names shown (you may user your own but of proper data type) for rows 2 and 3. We assume only 3 rows to exist in this table.  It can contain any number of rows. Click the Close(x) button.

 
The table gets saved with the values you entered. When you run the Select query as shown, you will see the three rows with values you entered. The column with no name shows just the row numbers.


Adding the Identity column

Right click dbo.Client table in Object Explorer in the Tables node. The following window with two panes open as shown. You may need to click the 4th row below the one with Lname 'Amanda' in the above to add the Id column.


For ColumnName enter 'Id'. For DataType enter or choose 'tinyint' and place check mark for Allow Nulls as shown. The bottom pane is automatically populated as shown.


In the bottom pane scroll down to the line shown, 'Identity Specification' .  Change from 'No' to 'Yes' indicating you want Id to be an identity column. The Identity Increment and Identity Seed gets filled with default values and you will notice that the check mark for Allow Nulls is removed as soon as you make these changes.


After making Id the identity column your table design is displayed as shown.


Again run a Select statement as shown and you will see the Id column as being added to your table.

 
Adding the Primary Key
 Now that you have added the Identity column, you will now designate that column to contain the Primary Key.

Open the table in design view.  Highlight the row containing Id and then right click that row to open a drop-down menu as shown.


Choose, Set Primary Key. The Id column will now show a 'Key' left to the column as shown.

 
After the above step, you will have set the Identity column to have the Primary Key. Expand the dbo.Client table as shown to see the 4 columns and the Key you added.


This completes the procedure to add an identity column to a pre-existing, populated table.


Monday, August 17, 2015

Hands-on Learning Event in Honolulu 1 : Introduction to Structured Query Language

The above course will be offered again as a non-credit course by the Pacific Center for Advanced Technology Training.

Course summary:
Databases, organized repositories of information, have become indispensable and in fact even more relevant despite the emergence of Big Data in today's world.
In this introductory course you will learn about relational databases and the basics of Structured Query Language (SQL) including sorting; grouping result sets; using DDL, DML, DCL, and TCL. All SQL statements will initially be written for one table. Most practical, modern and relational databases will include a large number of tables and SQL queries have to access information from several tables. This course will then introduce you to querying more than one table. With this skill you will be able to query two or more tables in a database. This is a hands-on course which will take you from installing SQL Server 2012; learning the ins and outs of SQL Server Management Studio and of course a full dose of SQL.

  During each meeting the students will be assessed for their knowledge, competency and proficiency in SQL.

New this session:
SQL Azure Database: SQL Server in Microsoft Cloud
Windows PowerShell for SQL Server


Schedule:
Sept 22 - Oct 22, 2015; Tuesdays and Thrusdays; 5:30 pm - 7:30 pm; 10 mtgs

Sunday, August 9, 2015

Connecting to SQL Server 2012 using PowerBI

Kindly follow this post to download PowerBI. Also read up on some of the related posts here and here.

I will be connecting to the Person.person table in AdventureWorks 2012 database on my named SQL Server 2012 instance RegencyPark shown here:


BISQL2012_03

Launch PowerBI desktop to open the following:


BISQL2012_01

Click GetData to see your popular options.


BISQL2012_02


Click on SQL Server to open the SQL Server Database:

BISQL2012_04

Enter the credentials as shown. Enter full name <computername/Instance name>. Database name is optional but if you already know the database name enter as shown here (by doing so one less step, perhaps). Click OK.


BISQL2012_05

You can use Windows Authentication (as I am doing here as the current owner of the computer as used in the installation of the named instance.

BISQL2012_05

Click Connect.


BISQL2012_06

Read the encryption support message. Click OK. You are connected to the database. Click on the table Person.person.


BISQL2012_06

Rock and Roll, you are ready to visualize.

Thursday, August 6, 2015

Install the correct build of SQL Server 2016 CTP 2.2

SQL Server 2016 CTP 2.1 was released (June 24, 2015) . CTP 2.0 to CTP 2.1 upgrading is described here

Initial release of SQL Server 2016 CTP 2.2 build with release version 13.0.400.91 had the feature Always On Availability not working as expected and Microsoft has released an updated build with version 13.0.407.1 for SQL Server 2016 CTP 2.2.

The updated version of SQL Server 2016 CTP 2.2, build 13.0.407.1 can now be downloaded from here:
https://www.microsoft.com/en-us/evalcenter/evaluate-sql-server-2016

From the same link you could download SQL Server 2012 SP1 and SQL Server 2014 SP1 as well.
Release notes for SQL Server 2016 are available here.

I am not paying this invoice. I am disregarding it, becuase....

 I am not paying this invoice because MICROSOFT has not provided me with a satisfactory way to access my account since June of this year des...